Thursday, April 30, 2020

Tracy Parry Meaty Spaghetti Sauce

1 lb ground beef or meat of choice
2 - 8 oz cans of tomato sauce
2  sauce cans of water
2 - 6 oz cans of tomato paste
2 Tbsp dried parsley
2 Tbsp dried oregano
1-2 tsp garlic powder
2 dried bay leaves
1/4 tsp Italian seasoning
2-3 Tbsp sugar
Salt and pepper

Brown meat over medium high heat, drain off excess fat.  Add tomato sauce and paste.  Fill the 2 sauce cans with water and add to pot.  Stir until all combined.  Add all other ingredients.  Bring to an almost boil and turn heat down to low.  Partially cover and let simmer for two hours.  Serve over favorite noodles or veggie noodles.

Sunday, April 26, 2020

EASY SOURDOUGH BISCUITS

Pinch My Salt 

yield: EIGHT 3-INCH BISCUITS
prep time: 15 MINUTES
cook time: 15 MINUTES
total time: 30 MINUTES

INGREDIENTS

  • 1 cup flour
  • scant 1/2 teaspoon salt (or 1 tsp kosher salt)
  • 1/2 teaspoon baking soda
  • 2 teaspoons baking powder
  • 6 tablespoons very cold unsalted butter, cut in small pieces
  • 1 cup cold unfed sourdough starter

INSTRUCTIONS

  1. Preheat oven to 425 degrees
  2. Sift or whisk together well the flour, salt, baking soda, and baking powder.
  3. Cut the butter into the flour using a pastry blender or your fingertips until the mixture looks like coarse crumbs with pieces of butter about the size of peas.
  4. Add the sourdough starter and mix with a spoon until most of the flour is incorporated. Knead the mixture in the bowl a few times until it comes together.
  5. Turn out dough onto a lightly floured work surface then roll or pat the dough out to about 3/4" thick.
  6. Cut biscuits, gather scraps, re-roll and cut out one or two more.
  7. Place biscuits on an ungreased baking sheet. Place them close together, touching, if you want soft-sided biscuits or space them apart for crisper sides.
  8. Bake at 425 degrees F for 12-15 minutes, until browning around the edges. If you placed biscuits close together, they will take longer than if they are spaced apart.

NOTES

You can either use all purpose flour or half all purpose and half cake flour for a lighter biscuit.
If using regular table salt or fine sea salt, use a scant half teaspoon of salt. If using Diamond Crystal kosher salt, use a full teaspoon.
If you want to use salted butter, reduce the salt in the recipe by half.

Saturday, April 25, 2020

Ambers Kitchen Classic White Bread

@AmbersKitchen

amberskitchen
Guys.... this is it. This is my tried and true basic white bread recipe that I have made over 300 times. This recipe is why I don’t buy storebought bread. (When you are used to eating this, storebought bread tastes like cardboard) This bread might make you sing and dance and make you a rockstar to all who eat it. I promise, it’s amazing!
 
CLASSIC WHITE BREAD

INGREDIENTS:
3/4 Cup Cane sugar (I often sub for coconut sugar)
3 cups warm water (baby bottle temperature)
1 1/2 Tablespoon active dry yeast (not instant)
1/3 cup coconut oil, melted (can sub for vegetable oil)
1 egg, beaten
1 Tablespoon salt
7 1/2 to 8 1/2 cups bread flour (I often sub for kamut flour, in which case I decrease the amount of flour to about 7 cups)

DIRECTIONS:
1. Combine sugar, warm water, and yeast in a large mixing bowl. (Or a Bosch mixer is perfect for this recipe)
2. let stand for 10 minutes while the yeast poofs and dissolves.
3. Combine oil, egg, and salt into yeast mixture. Mix to combine.
4. Add flour, one cup at a time, mixing well and kneading well in between. Don’t add all the flour at once, especially towards the end. How much flour you need depends on lots of variables- you don’t want dough that’s too dry. It needs to be elastic and slightly sticky, but not so wet that it leaves moisture at the side of the bowl.
5. Knead for 5 min by hand or 2-3 minutes in a mixer.
6. Cover dough with a clean dish towel and allow it to rise until doubled, about 45 min. Then punch down. Allow to rise for a 2nd time, covered, for 30-45 min. Then separate dough into 3 equal sections and with a rolling pin, roll into sections approximately 5 inches by 12 inches. With each section, roll it from bottom to top and put seam side down into a greased 4x8 inch loaf pan. Cover with a clean kitchen towel and let rise 30 minutes.
7. Bake at 380 degrees for 24 minutes (this is a change from what the video says) or when tops are golden brown. Take out of loaf pans, let cool on a wire rack for at least 30 minutes before slicing.

Buttery Pull Apart Bundt Bread


www.melskitchencafe.com 
 

Prep Time 25 minutes
Cook Time 25 minutes
Additional Time 2 hours
Total Time 2 hours 50 minutes

Ingredients

  • 1 cup warm water
  • 1/4 cup granulated sugar
  • 1 tablespoon instant yeast (see note for active dry yeast)
  • 1 large egg
  • 1 tablespoon oil
  • 1 teaspoon salt
  • 3 1/4 to 3 1/2 cups all-purpose flour (see note for whole wheat)
  • 8 tablespoons butter, melted (I use salted)

Instructions

  1. In the bowl of an electric stand mixer fitted with the dough hook (you can make this by hand, too) add the warm water, sugar, yeast, egg, oil, salt, and 2 cups of flour.
  2. Mix until combined - it's ok if it is a little lumpy. With the mixer running, continue to gradually add flour until the dough clears the sides of the bowl and forms a ball that is soft but not overly sticky. Knead for 2-3 minutes. Cover the top of the bowl, and let the dough rest for 10-15 minutes. It should puff slightly.
  3. Pour half (4 tablespoons) of the melted butter evenly in the bottom of a bundt pan (if you don't have a bundt pan, you can use loaf pans).
  4. On a lightly floured or greased countertop, press or roll the dough into a 1/2-inch thick rectangle, about 12X10 inches. Using a pizza cutter or sharp knife, cut the dough into 24 semi-equal squares.
  5. Grab one square at a time, dip the bottom of the square in the butter in the pan and layer the squares against each other (kind of like a trail of dominoes that has fallen over on each other). See pictures in the post for a visual. All 24 squares should fit in a layer around the bottom of the pan. Lift and rearrange the squares, if needed, to fit them all in.
  6. Cover the bundt pan and let the dough rise until noticeably puffy, 45-60 minutes. After the dough has risen, pour the remaining 4 tablespoons butter over and around the top of the bread.
  7. Preheat the oven to 375 degrees F.
  8. Bake the bread for 20-25 minutes until golden brown on top and baked through. Remove the pan from the oven and let rest for 5-10 minutes before turning out onto a plate or platter (lay the plate upside down over the bundt pan and holding onto both the plate and pan at the same time, flip it over so the bread falls out onto the plate).
  9. Serve warm or at room temperature.

Notes

Yeast: to substitute active dry yeast, use increase the amount to 1 1/4 tablespoons and dissolve the yeast in 3-4 tablespoons water, letting it rest until the mixture is bubbly and foamy. Use in the recipe as directed.
Flour: I've successfully made this bread with half whole wheat flour/half all-purpose flour. I haven't tried it with bread flour (should work great) or 100% whole wheat flour.
Cheese + Herbs: I think this bread would adapt VERY well to other flavors. Maybe sprinkle Parmesan or Asiago cheese on the bottom over the butter before layering in the dough? Or some fresh or dried herbs? Yum.
https://www.melskitchencafe.com/buttery-pull-apart-bundt-bread/

Princess Pizza

Best Pizza at Sea

Pizza Dough Yield – 10 Servings Ingredients

• 3 cups flour
• 2 teaspoons active or instant yeast
• 1 pinch sugar
• 1 to 1 1/4 cups lukewarm water
• 2 tablespoons olive oil
• 1 teaspoon salt
• Flour for dusting
• Cornmeal for dusting bottom on pan

Method of Preparation

• If using active dry yeast, dissolve it, with a pinch of sugar, in 2 tbsp of lukewarm water.
• Let the yeast and water sit at room temperature for 15 minutes, until the mixture has bubbled and expanded.
• If using instant yeast skip this step.
• Add flour, water, olive oil, and mix again until combined.
• Add salt and mix for five more minutes. The pizza dough should be smooth and firm.
• Remove from bowl and place in a covered container overnight in the refrigerator.
• When ready to use, remove dough from refrigerator and divide into 2 equal pieces, depending on how large you want to make the pizzas. Shape each piece into a ball.
• Spray dough with cooking oil and allow to rest at room temperature for 1 hour, covered loosely with plastic wrap.
• Preheat oven to 450°.
• Dust a flat surface with flour. Gently press one ball of dough into a disk shape on the floured surface.
• Sprinkle dough with flour and stretch into a large, round shape. Dip fingertips in flour if the dough gets sticky.
• Carefully transfer dough onto a pizza pan that has been sprinkled with cornmeal to prevent sticking.
• Top with sauce, mozzarella cheese and desired toppings.
• Bake in preheated oven for 6-8 minutes, or until cheese and crust at golden brown.

 Tomato Sauce for Pizza Yield – 10 Servings Ingredients

• 1-28 oz. can diced tomatoes
• 2 cloves garlic, chopped
• ¼ cup olive oil
• 1 tablespoons dried oregano
• Salt and pepper to taste

Method of Preparation

• Heat olive oil in a large pot.
• Add chopped garlic and sauté lightly.
• Add tomatoes and bring to a boil.
• Reduce heat and simmer until reduced by one third.
• Add dried oregano.
• Season to taste with salt and pepper.
• If you want a smoother sauce – gently use an immersion blender to the desired consistency.
• Allow sauce to cool before spreading on pizza dough.


Friday, April 24, 2020

Cadbury Egg Cookies


two peas & their pod


Cadbury Cookies-Chocolate chip cookies with Cadbury Mini Eggs and toasted coconut. The perfect cookies for spring and Easter!

Ingredients

  • 3 cups all-purpose flour
  • 1 1/2 teaspoons baking powder
  • 1 teaspoon baking soda
  • 1 teaspoon sea salt
  • 1 cup unsalted butter, at room temperature
  • 1 1/2 cups light brown sugar
  • 1/2 cup granulated sugar
  • 2 large eggs
  • 2 teaspoons pure vanilla extract
  • 1 1/2 cups chopped Cadbury Mini Eggs
  • 1 cup chocolate chips
  • 1 cup toasted coconut
  • Flaked sea salt, for sprinkling on cookies

Instructions

  1. Preheat oven to 350 degrees F. Line a large baking sheet with a Silpat baking mat or parchment paper and set aside.
  2. In a medium bowl, whisk together flour, baking powder, baking soda, and sea salt. Set aside.
  3. Using a stand mixer, cream butter and sugars together for about 1 minute. Add in the eggs and vanilla and mix until combined.
  4. Add the dry ingredients and mix on low until just combined.
  5. Stir in the chopped Cadbury Mini Eggs, chocolate chips, and toasted coconut.
  6. Form the cookie dough into balls, about 2 tablespoons of dough. Place on prepared baking sheet, about 2 inches apart.
  7. Bake cookies for 10-12 minutes or until the edges are slightly golden brown. Remove from oven and sprinkle with sea salt. Let cookies cool on the baking sheet for 5 minutes. Transfer to a wire cooling rack and cool completely.

Recipe Notes

See the post for instructions on how to toast coconut. You can chill the cookie dough for 24 to 72 hours if you want to enhance the flavor of the cookies. The cookies will keep in an airtight container for 3-4 days. You can also freeze the cookie dough and baked cookies.

Tuesday, April 21, 2020

Cheesy Chicken Enchilada Bake

Mels Kitchen Cafe

 cheesy chicken enchilada bake over brown rice on white platter

Yield: 6 servings

Prep Time 30 minutes 

Cook Time 45 minutes 

Additional Time 15 minutes


Total Time 1 hour 30 minutes

Ingredients:

  • 2 cups salsa verde or guacamole salsa (see note)
  • 1 1/2 pounds boneless, skinless chicken thighs or chicken breasts (I use thin cut)
  • 1 tablespoon oil
  • 1 medium yellow or white onion, thinly sliced into half moons
  • 2 medium bell peppers, cored and sliced into strips
  • 1/2 teaspoon salt
  • Pinch of black pepper
  • 1 can (15-ounce) black beans, rinsed and drained
  • 1 to 2 cups shredded Monterey Jack or sharp cheddar cheese (or a combo)
  • Fresh, chopped cilantro

Seasoning Mix:

  • 1 teaspoon dried oregano
  • 1/2 teaspoon garlic powder
  • 1/2 teaspoon chili powder
  • 1/2 teaspoon cumin
  • 1/2 teaspoon salt (I use coarse, kosher salt)
  • 1/4 teaspoon black pepper

Instructions

  1. Preheat the oven to 350 degrees F. Lightly grease a 9X13-inch (or similar sized) baking dish. Spread one cup of the salsa verde (or guacamole salsa) in the bottom of the pan. Set aside.
  2. In a small bowl, combine all the seasoning mix ingredients. Pat the chicken dry. If using chicken breasts, cut them into thinner strips (similar to chicken tenderloin size or slightly larger). Sprinkle the seasoning mix evenly over the chicken (both sides). Set aside.
  3. In a 12-inch skillet or saute pan, heat the oil over medium heat. Add the onions and peppers. Sprinkle with salt and pepper. Saute until the onions and peppers start to soften, 3-4 minutes (they'll cook a bit more in the oven). Spread the onions and peppers over the salsa in the pan.
  4. Return the skillet to medium heat and add a drizzle of oil if the pan is dry. Add the chicken in a single layer (may need to do this in two batches) and cook for 30 - 60 seconds per side for some quick browning action - don't overcook (the chicken will cook longer in the oven). Remove the chicken from the pan and place in a single layer over the vegetables.
  5. Sprinkle the black beans over the chicken. Pour the remaining one cup salsa over the beans. Cover the dish with foil and bake for 20 minutes (bake for 35 minutes in this step if using chicken thighs).
  6. Uncover, sprinkle with cheese, and bake for another 10-15 minutes until the chicken is cooked through and the cheese is melted and bubbly. Add time, as needed, for the chicken to fully cook through.
  7. Remove from the oven, sprinkle with fresh cilantro, and let rest for 10-15 minutes. The sauce will thicken as the casserole rests. Serve over rice, quinoa, cauliflower rice, etc OR serve in tortillas (or roll up in burritos or enchiladas). Serve with additional toppings/garnishes as desired: avocados, fresh lime wedges, sour cream, additional cheese, tomatoes, etc.

Notes

Salsa Verde: this recipe is pretty adaptable for what kind of sauce to use. The best variation I've tried is salsa verde (I use Trader Joe's brand) on the bottom of the dish and the creamy guacamole salsa (Herdez brand) over the top. I think green enchilada sauce could work equally well, too.
Slow Cooker: I haven't tried it yet, but I think this could transition extremely well to a slow cooker meal. Follow all the steps in the recipe except layer the ingredients in a greased slow cooker instead of a baking dish. Maybe 4-5 hours on low? Yes, I'm liking that idea quite a lot.
https://www.melskitchencafe.com/chicken-enchilada-bake/

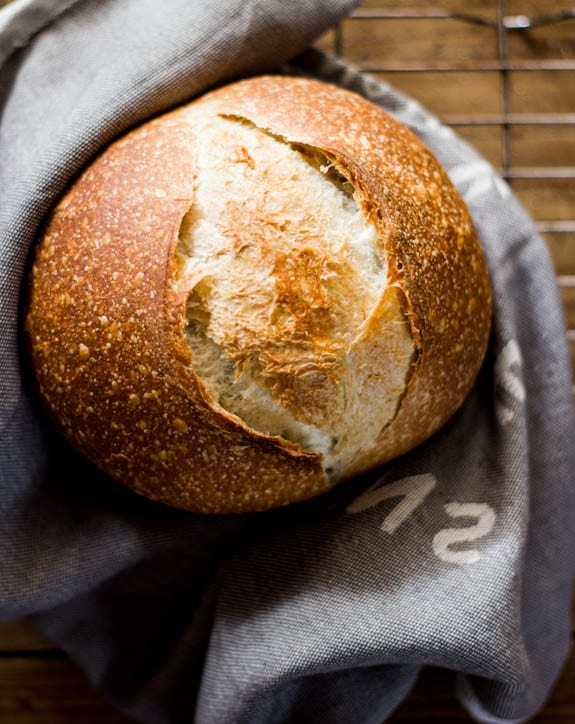
Sourdough Bread: A Beginner’s Guide

The Clever Carrot

sourdough bread: a beginner's guide | theclevercarrot.com

    Description

    This beginner sourdough recipe is perfect for bakers looking to jump right in! It’s is a low-hydration dough, meaning it will yield a ‘tight’ crumb (small holes). It is great for sandwiches and toast.

    Ingredients

    5.35 oz / 150g bubbly, active starter
    8.80 oz / 250g warm water, preferably filtered
    .90 oz / 25g olive oil
    17.65 oz / 500g bread flour (not all purpose)
    .35 oz / 10g fine sea salt
    fine ground cornmeal, for dusting
    *You will need a 6 quart Dutch oven for baking
    ** This recipe was tested with King Arthur, Gold Medal + Pillsbury bread flour

    Instructions

    1. To make the dough: Whisk the starter, water, and olive oil in a large bowl. Add the flour and salt. Squish everything together with your hands until all of the flour is absorbed. Rest (autolyse) for 30 minutes.
    2. After the dough has rested, work the dough in the bowl into a rough ball, about 15 seconds.
    3. Bulk fermentation: Cover the bowl with plastic wrap and a clean kitchen towel. Leave it in a warm, sunny spot to rise. Your dough is ready when it no longer looks dense, and has increased in volume about 1½- 2x its original size. This can take anywhere from 3-12 hours depending on the temperature of your ingredients, the potency of your starter and surrounding environment. I make my dough in the afternoon, and leave it to rise overnight. See my Winter Weekend Baking schedule (in post above) for more details.
    4. Stretch & folds: During bulk fermentation, you have the option to perform a series of ‘stretch & folds’ to strengthen the dough. Simply gather a portion of the dough, stretch it upwards and then fold it over itself. Rotate the bowl ¼ turn and repeat this process until you have come full circle. Do this once or twice spaced an hour apart. Although this step is not mandatory, it will increase the total volume of your bread.
    5. Cutting & shaping: To cut and shape the dough, divide your work surface in half; lightly flour one side (for cutting) and leave the other half clean (for shaping).
    6. Remove the dough from the bowl, and place onto the floured section so that it does not stick. You do not need to ‘punch down’ the dough; it will gently deflate as you fold and shape it.
    7. Cut the dough in half to make 2 loaves, or leave it whole for a single loaf.
    8. To shape, use a bench scraper to move your dough to the non-floured section (if there is any flour present, it will be difficult to shape- brush away any excess). Starting at the top, fold the dough over toward the center. Give it a slight turn, and then fold over the next section of dough. Repeat until you have come full circle. Then flip the dough over and place it seam side down. Using your hands, gently cup the sides of the dough and rotate it, using quarter turns in a circular motion. You can also pull it towards you to even out the shape. Repeat this process until you are happy with its appearance.*See note below.
    9. Second rise: Coat the bottom of your Dutch oven with cornmeal. Alternatively, use parchment paper to prevent sticking (this is what I do, now). Place the dough inside for a second shorter rise, about 1-2 hours. It is ready when the dough is slightly puffy.
    10. Slashing the dough: Right before your bread goes into the oven, make a shallow slash about 2 inches long in the center of the dough. Use a bread lame, a sharp pairing or serrated knife.
    11. Preparing the oven: When ready to bake, preheat your oven to 450 F.
    12. Place your bread into the oven (lid on) and reduce the temperature to 400 F. Bake for 20 minutes. Remove the lid, and continue to bake (uncovered) for an additional 40 minutes or until deep, golden brown. Keep in mind that all ovens are different; you might have to make minimal adjustments to these temperatures.
    13. During the last 10 minutes of baking, crack open the oven door. This allows the moisture to escape, leaving your bread with a crisp crust.
    14. You can also take the internal temperature of your bread to double check that it is done. For sourdough, it should read about 205 F.
    15. Cooling: Remove the bread from the oven, and cool on a wire rack for at least an hour before slicing. Don’t cut too soon or else the inside will have a gummy texture!

    Notes

    When shaping, the idea is for the dough to catch enough surface tension on a non-floured area in order to create a tight ball. If there is flour present, it will slide around…and drive you nuts.

    Wednesday, April 8, 2020

    Disney Dole Whip

    From the Disneyland App
    The recipe (for a single serving) reads at the following:
    • 1 big scoop of ice cream
    • 4 oz of pineapple juice
    • 2 cups of frozen pineapple
    • Add all ingredients to a blender until it’s a thick drink.
    • Add your swirl and then you’re done.

    Disney Parks Churro Bites

    Disney Parks Churro Bites Recipe

    Ingredients
    • 1 cup water
    • 8 tablespoons butter
    • ¼ teaspoon salt
    • ¾ teaspoon ground cinnamon, divided
    • 1 ¼ cups all-purpose flour
    • 3 eggs
    • 1 ½ cups vegetable or canola oil
    • ½ cup sugar
    Instructions
    1. Combine water, butter, salt, and ¼ teaspoon cinnamon in 1 ½-quart saucepan over medium heat. Bring pot to rolling boil.
    2. Reduce heat to low.
    3. Add flour and stir vigorously until mix forms a ball. Remove from heat and let rest for 5-7 min.
    4. Add eggs, one at a time, and stir until combined. Set aside.
    5. Heat oil in medium skillet or 1-quart saucepan over medium-high heat or until temperature reaches 350˚.
    6. Spoon dough into piping bag fitted with large star tip. Pipe 1-inch strip of dough over saucepan, cut with knife, and drop into hot oil. Repeat until churro bites fill saucepan with room to fry. 
    7. Fry churro bites until golden brown. Remove with slotted spoon or mesh spider strainer.
    8. Drain churro bites on paper towel.
    9. Mix sugar and ½ teaspoon cinnamon in medium bowl. Toss in churro bites until coated. Place on serving plate and serve with favorite dipping sauce.

    Sourdough Biscuits.


    1 cup sourdough starter
    2 cups whole milk ( I used skim milk)
    1/4 cup butter or margarine melted
    2 cups all-purpose flour
    Mix the above ingredients together. Don’t pour melted butter in while still hot, let cool to warm.
    Cover with saran wrap but leave opening on sides so batter can breathe. Let sit overnight.
    In the morning combine:
    2 1/2 cups all purpose flour
    1 tablespoon sugar
    2 teaspoons salt
    1 tablespoon baking powder
    1 teaspoon baking soda
    Mix the above dry ingredients and add to wet mixture from night before. Add enough flour that you can get it onto a well floured surface and knead but leave it a little sticky inside. Roll to 1/2 inch thick, cut out and place on a greased baking sheet. This makes about 20 large biscuits.
    Bake at 400 degrees 18 to 20 minutes. These are wonderful leftover and put in microwave for 20 seconds with butter and honey.